
Ready or not, Halloween is right around the corner. And if you're someone who tends to procrastinate on their costume until the last minute, consider this: You might not need one. We consider ourselves pretty creative, but trying on different outfits for an hour hoping inspiration will strike can seem pointless when the world of makeup holds endless possibilities. None of which, may we point out, involve any variety of sexy [fill-in-the-blank]. So this year, we're moving past the constraints of our closets and diving face first into our makeup bags instead.
Together with makeup artist Allie Smith, we created two wildly different but insanely cool Halloween beauty looks. They're abstract enough to give you room to play and personalize, yet simple enough to throw together before you head out for the night. Between Smith's expert application tips and our wallet-friendly product picks from Walmart (that you can still use for your everyday makeup after Halloween — score!), the only thing harder than figuring out which option to try this year is ultimately having to wash off your amazing artistry at the end of the night.

Bright Eyes
Difficulty Level: Beginner
We'll take any reason to pile on the glitter, and Halloween is no exception. Inspired by a shimmering disco ball, Smith created this simple and shiny silver look fit for a dancing queen. Ahead, see how it came together, and get ready to do a couple of spins on the dance floor.
Photographed by Winnie Au.
Prep your skin with foundation as needed, then define your eyes with a few generous coats of mascara. You'll still want your lashes to pop from behind all that glitter!
Next, give yourself a lit-from-within glow by applying a thin layer of liquid illuminator all over your face. Add a little extra along the bridge of your nose, the tops of your cheekbones, and at your Cupid's bow to lay the strobe groundwork.
Revlon, $11.78, available at WalmartPhotographed by Winnie Au.
Now it's time to amp up the strobe effect even more. Dab a metallic cream eyeshadow at the inner corners of your eyes. Then glide it from the arches of your brows out toward your temples and back in along the tops of your cheekbones (think of it like making a giant "V" around each eye). You can also hit the bridge of your nose and your Cupid's bow again. This not only gives your skin an otherworldly sheen, but it gives the glitter you'll apply next something to stick to.
Photographed by Winnie Au.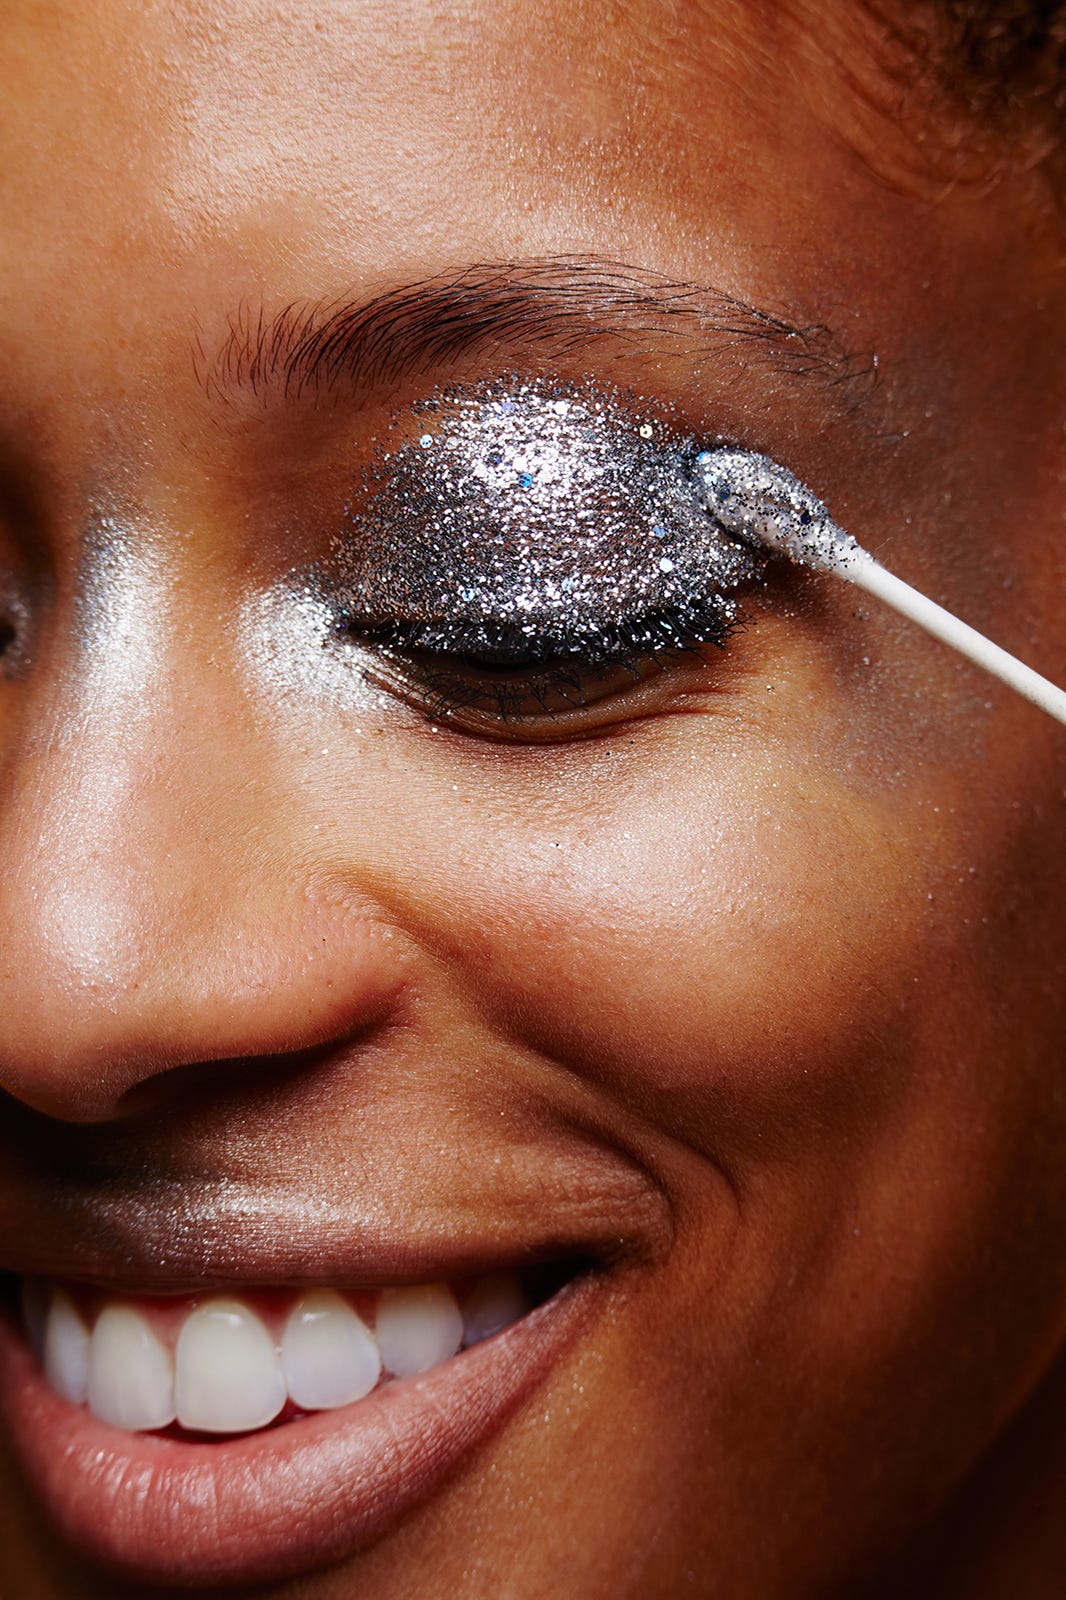
Here comes the fun part! Dip a cotton swab in regular moisturizer and coat it in silver glitter (just make sure it's glitter that's formulated for your eyes!). Softly roll the mixture from your lashline up past your crease, covering your entire eyelid. The lotion helps the glitter stick to your skin and keeps fall-out to a minimum, while the rolling method ensures even coverage.
And don't worry if you do get a little shimmer below your eyes — it'll enhance the look, giving you an ethereal glow when lights hit your face.
Hard Candy, $4.24, available at WalmartPhotographed by Winnie Au.
After you've finished coating your lids, dip a fluffy brush into the same mixture and pat it softly around your entire eye area in a circular shape, à la a disco ball. You can play around with the diameter of the circles (we went above our model's browbones and below her cheekbones here). Just make sure to keep the glitter contained to two distinct circles, rather than extending across your nose or out to your temples, which can end up looking like a mask.
If you're already thinking ahead and wondering how you're going to get all this glitter off at the end of the night, you'll be able to use a dry, flat eyeliner or foundation brush to lightly scrape it off, says Smith. A little bit of tape will help with any errant pieces that fall off and disperse in the process.
Photographed by Winnie Au.
Once your eyes are set, go all out with a striking silver lip. We used a chrome face paint here (that's safe for lips!) mixed with a little balm to keep the lips from drying out, but you can go glittery with a sparkling silver gloss or even mix a loose silver pigment with petroleum jelly for a more metallic effect.
Custom Body Art, $6.96, available at WalmartPhotographed by Winnie Au.
See, told you this was easy. Now, round out your disco-ball look with your shiniest outfit, and get ready to shimmy shimmer all night.

Va-Va-Venetian
Difficulty Level: Advanced
Colombina-style Venetian masks are traditionally used to conceal parts of your face and, therefore, parts of your identity. But by using bold blue hues and glittering gold accents, this cover-up actually puts you front and center. For this makeup mask, we went with a classic figure-eight silhouette, adding dimension with three coordinating colors and intricate filigree, but there is plenty of freedom when it comes to the shape and design. See how it all went down ahead.
Photographed by Winnie Au.
Prep your skin with foundation as needed. You'll also want to create some subtle definition around your eyes so they don't get lost behind your "mask." Sweep on a coat of mascara, and tightline your upper and lower lashlines. The beauty of doing this first is that if you get mascara or liner on your lids, you can cover it right up with face paint.
Next, use a dark eyeliner pencil to plot out your mask shape. Smith gave this mask four main sections: a figure-eight base, a contrasting arrow on the forehead, a faux-eyeshadow and liner effect around the eyes, and negative space around the upper and lower lashlines to mimic the look you'd get from wearing a real mask.
With this in mind, she drew dots accordingly — first in vertical lines spanning from the hairline to the top of each cheekbone (aligned against the outer edge of each brow); then three dots in the center of her face from her forehead down the bridge of her nose; and finally just below her browbones and around her eyes for the magnified shadow and liner. Smith purposely left out the dots to create the negative-space effect because the eyeshadow and liner dots would act as guides. Place as few or as many dots as you need to help you envision your desired shape.
Photographed by Winnie Au.
Now, connect the dots with eyeliner. Be sure to also extend the shape out toward your hairline, the way a real mask might touch your hair. And don't stress about getting the lines perfect — you'll cover them with face paint later on.
Photographed by Winnie Au.
To fill in the "eyeshadow" sections right above your eyelids, dip a thin liner brush into cobalt-blue face paint. A cream eyeshadow or liquid liner works just as well here, too, but stay away from pencils, which can be tough to blend.
Think of this section as essentially a scaled-up version of your regular eyeshadow look. For each eye, start just inside the inner corner, go up into an arc that hits below your brow, and end right past the outer corner. Then start filling in the silhouette, starting from your crease and leaving your lid bare. Once you're done, "line" your eyes by dragging the color underneath your lower lashline until you hit the inner corner.
Wet n Wild, $2.93, available at WalmartPhotographed by Winnie Au.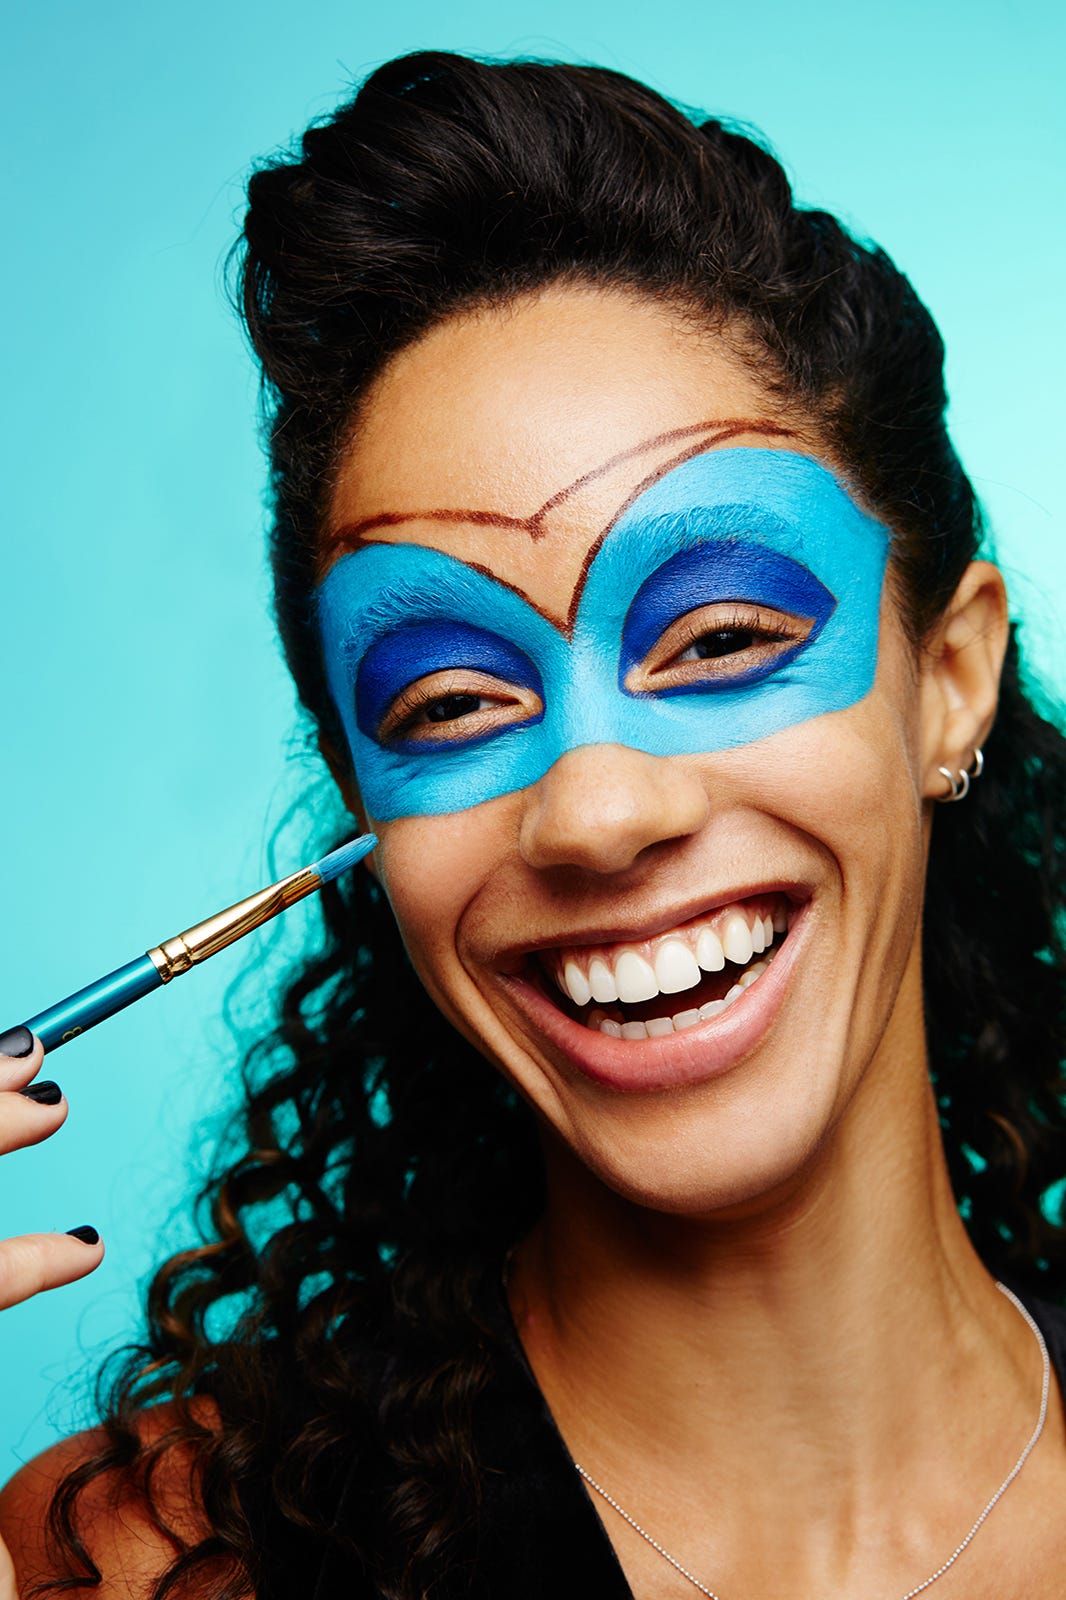
Fill in the large figure-eight shape next, using a turquoise-blue cream shadow and a flat eyeliner brush. To get the skin between your brow hairs, do a first coat of color by stippling cream shadow over your arches, then go back over them in painterly strokes.
Believe it or not, a "less is more" approach is best here. Paint the shadow on in thin layers for the most even color without going overboard. You can always go back and fill in more where you need it.
Depending on the look you want your mask to have, you can either color inside the lines you drew in the previous step, using a cotton swab dipped in makeup remover to wipe them away, or paint over them with the cream shadow, as Smith did here.
Maybelline, $5.47, available at WalmartPhotographed by Winnie Au.
To create the contrasting arrow shape along the forehead, use an eyeliner pencil with a gel texture for control and precision. This gunmetal shade from CoverGirl has flecks of silver shimmer that look almost blue in the light, which coordinates with the rest of the mask. But don't feel limited to our color palette — this is all about experimenting.
COVERGIRL, $4.72, available at WalmartPhotographed by Winnie Au.
Play up the area between the cobalt and turquoise shades with a flash of gold liquid liner to connect the two, gliding it from the inner to the outer corners of your eyes. Then, channel your inner artiste and decorate your mask with filigree-esque swirls. Smith limited the filigree to the outer edges, rather than covering the entire turquoise section, to keep the look more sophisticated than state-fair.
Now, make sure all of your hard work stays in place by using a flat foundation brush to tap translucent powder across your mask. Just don't drag or buff, Smith says, or you might risk smearing it.
Photographed by Winnie Au.
Since the colors of the mask are so bold and saturated, pair it with a neutral, monochromatic outfit to keep the spotlight on your face. Now, this wasn't too hard, was it?
Photographed by Winnie Au.
Like this post? There's more. Get tons of beauty tips, tutorials, and news on the Refinery29 Beauty Facebook page. Like us on Facebook — we'll see you there!
Like what you see? How about some more R29 goodness, right here?
There's A LOT Of Bacteria Lurking In Your Makeup Bag